Appearance
Customization Of Comparison Tables
AzonPress offers excellent customization features, making it easy to customize according to your needs. This article will guide you through Customizing Comparison Tables with AzonPress for Amazon products on your website.
How To Customize A Comparison Table
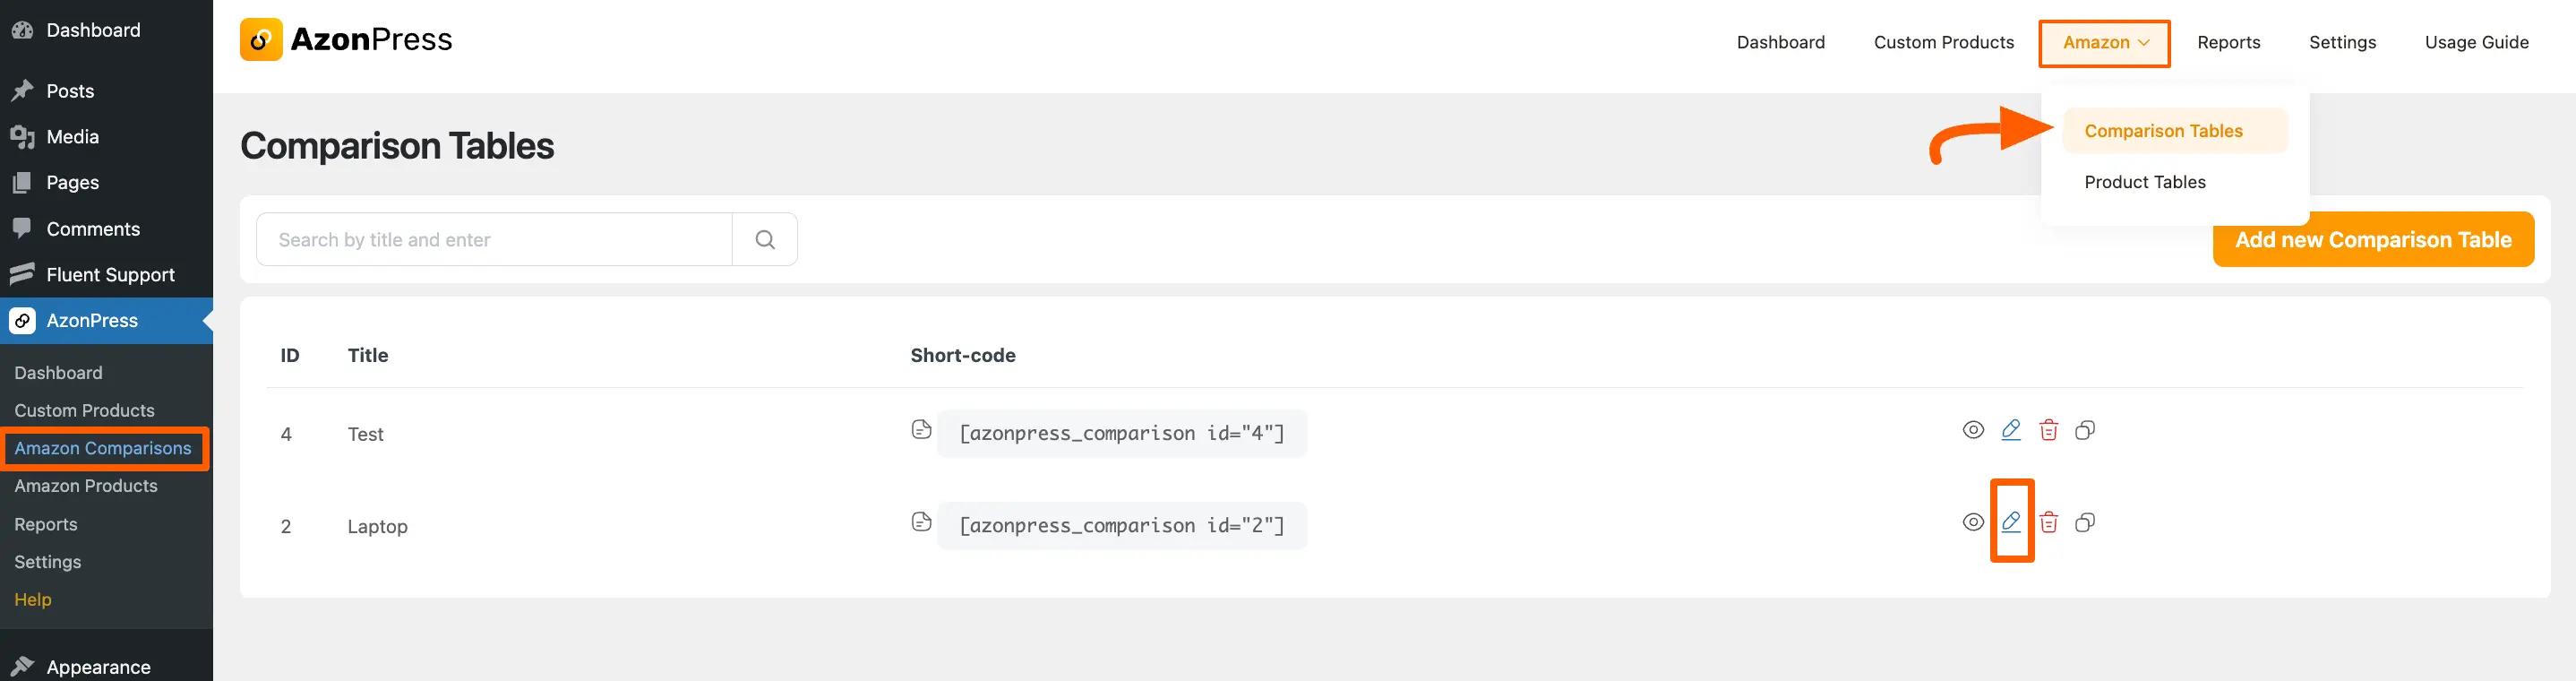
Go to Amazon Comparisons from the WordPress Sidebar or Comparison Tables from the Amazon dropdown in the top right corner of the AzonPress Navbar.
Now, select the desired Table you want to customize and click on the Pencil Icon.
If you do not have any existing Comparison Tables, you can create a new Comparison Table.
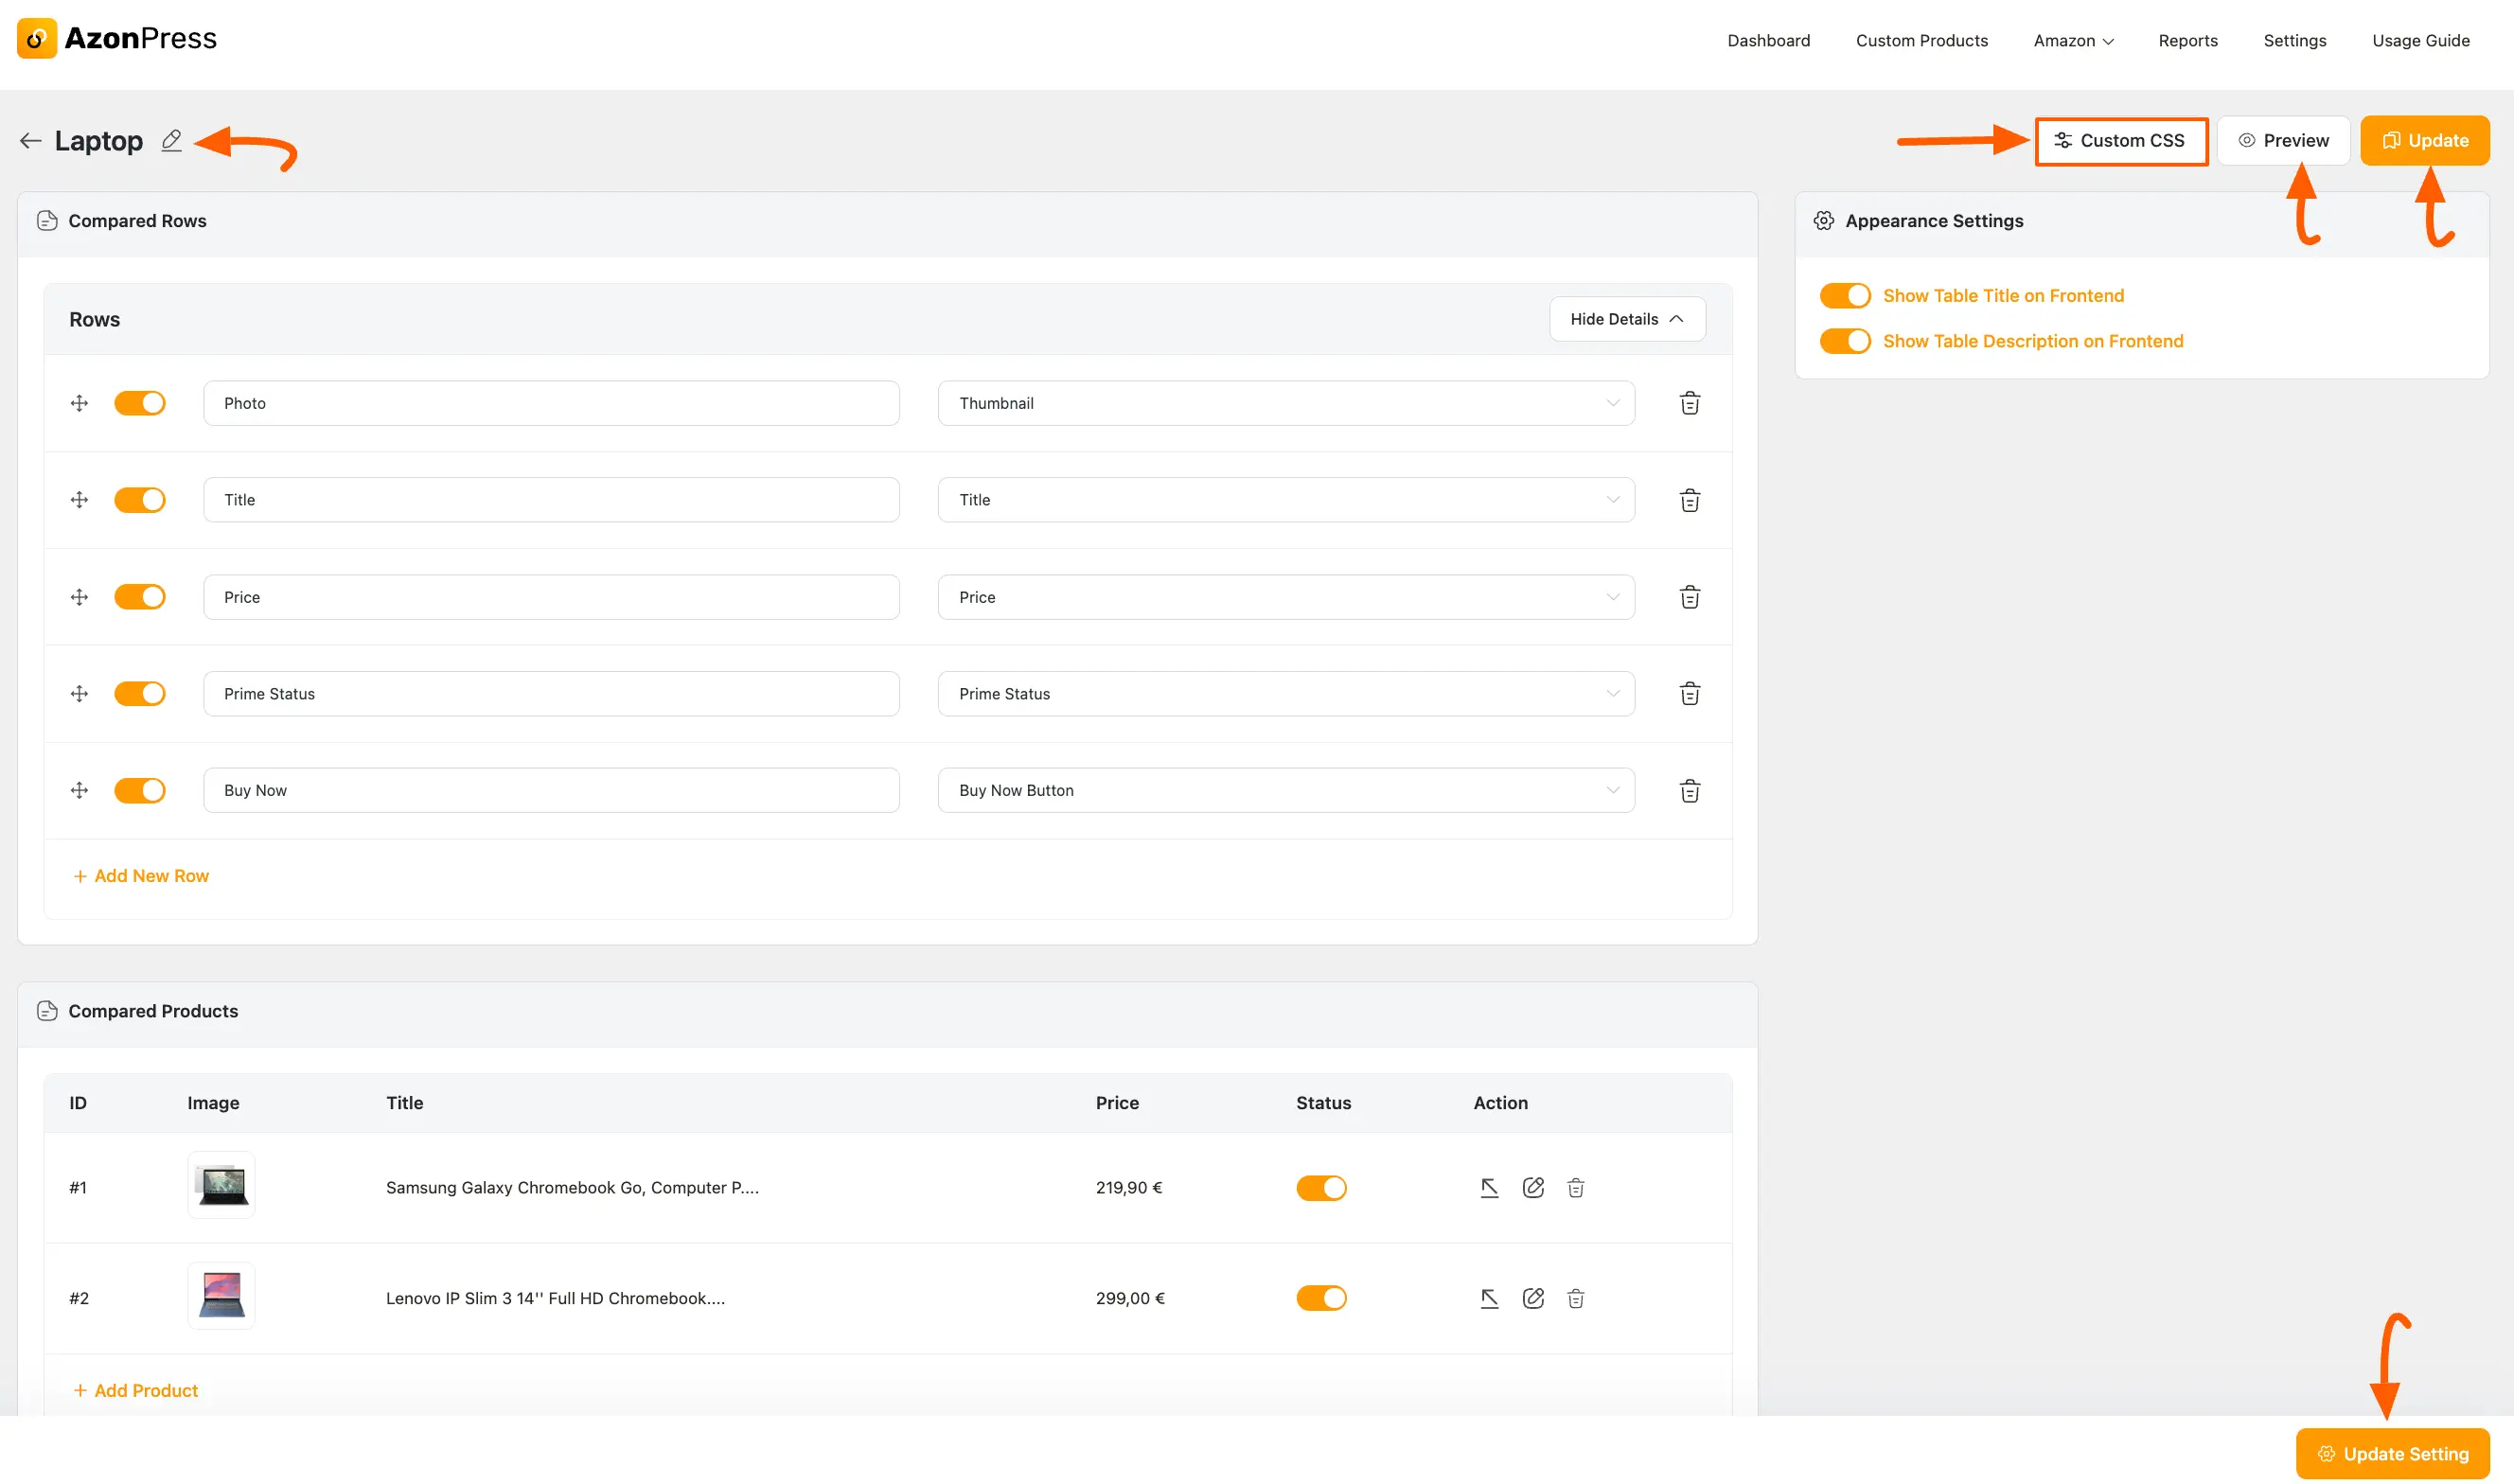
Now, you can see that your desired product table has been opened where you will find three major settings options. These are:
- Compared Rows
- Appearance Settings
- Compared Products
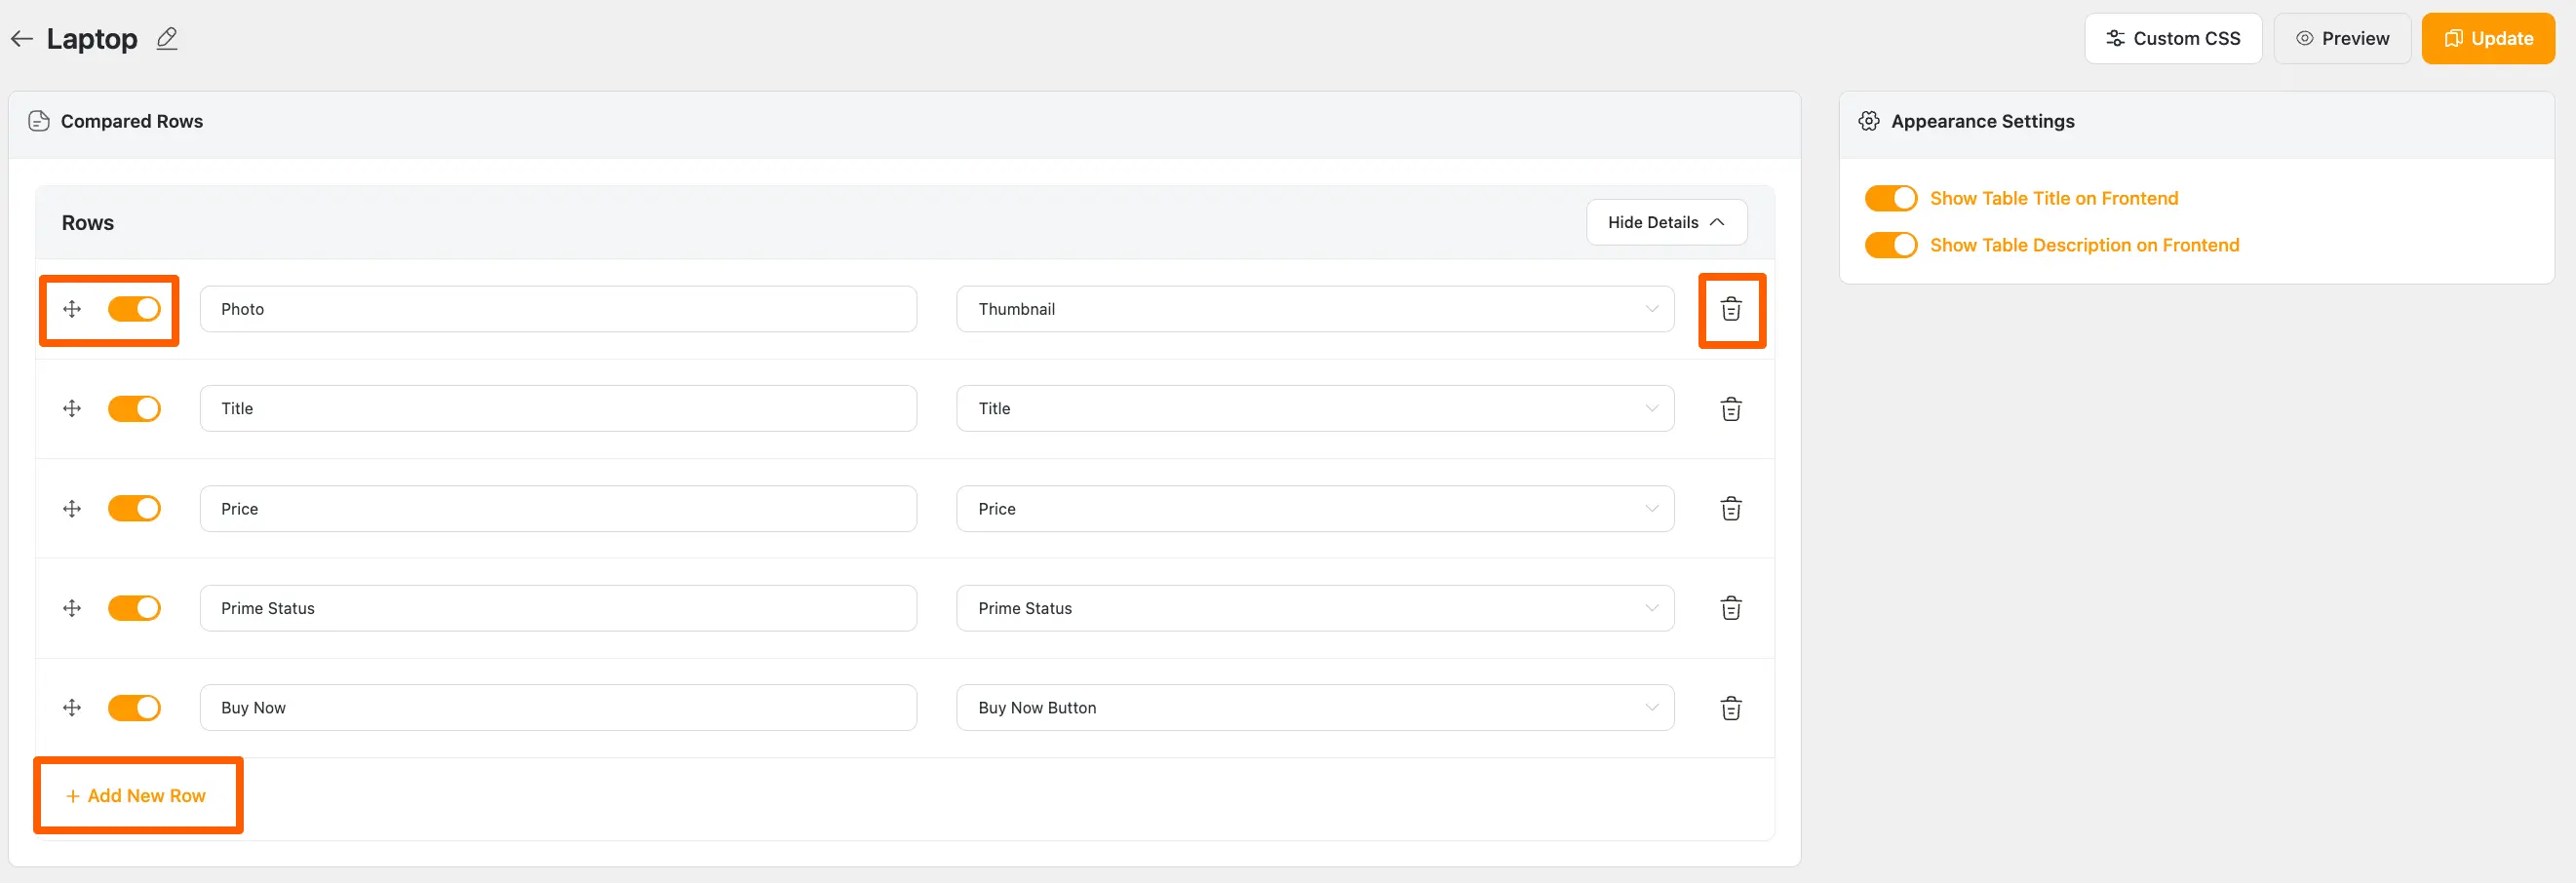
Compared Rows
Compared rows describe the product information that is directly fetched from Amazon product metadata. Every row has a list of dropdown options to change the value of that Row.
If you want to change, you can do it by clicking the Arrow Icon and choosing the appropriate one that suits your needs. You can also change the value of the column as well.
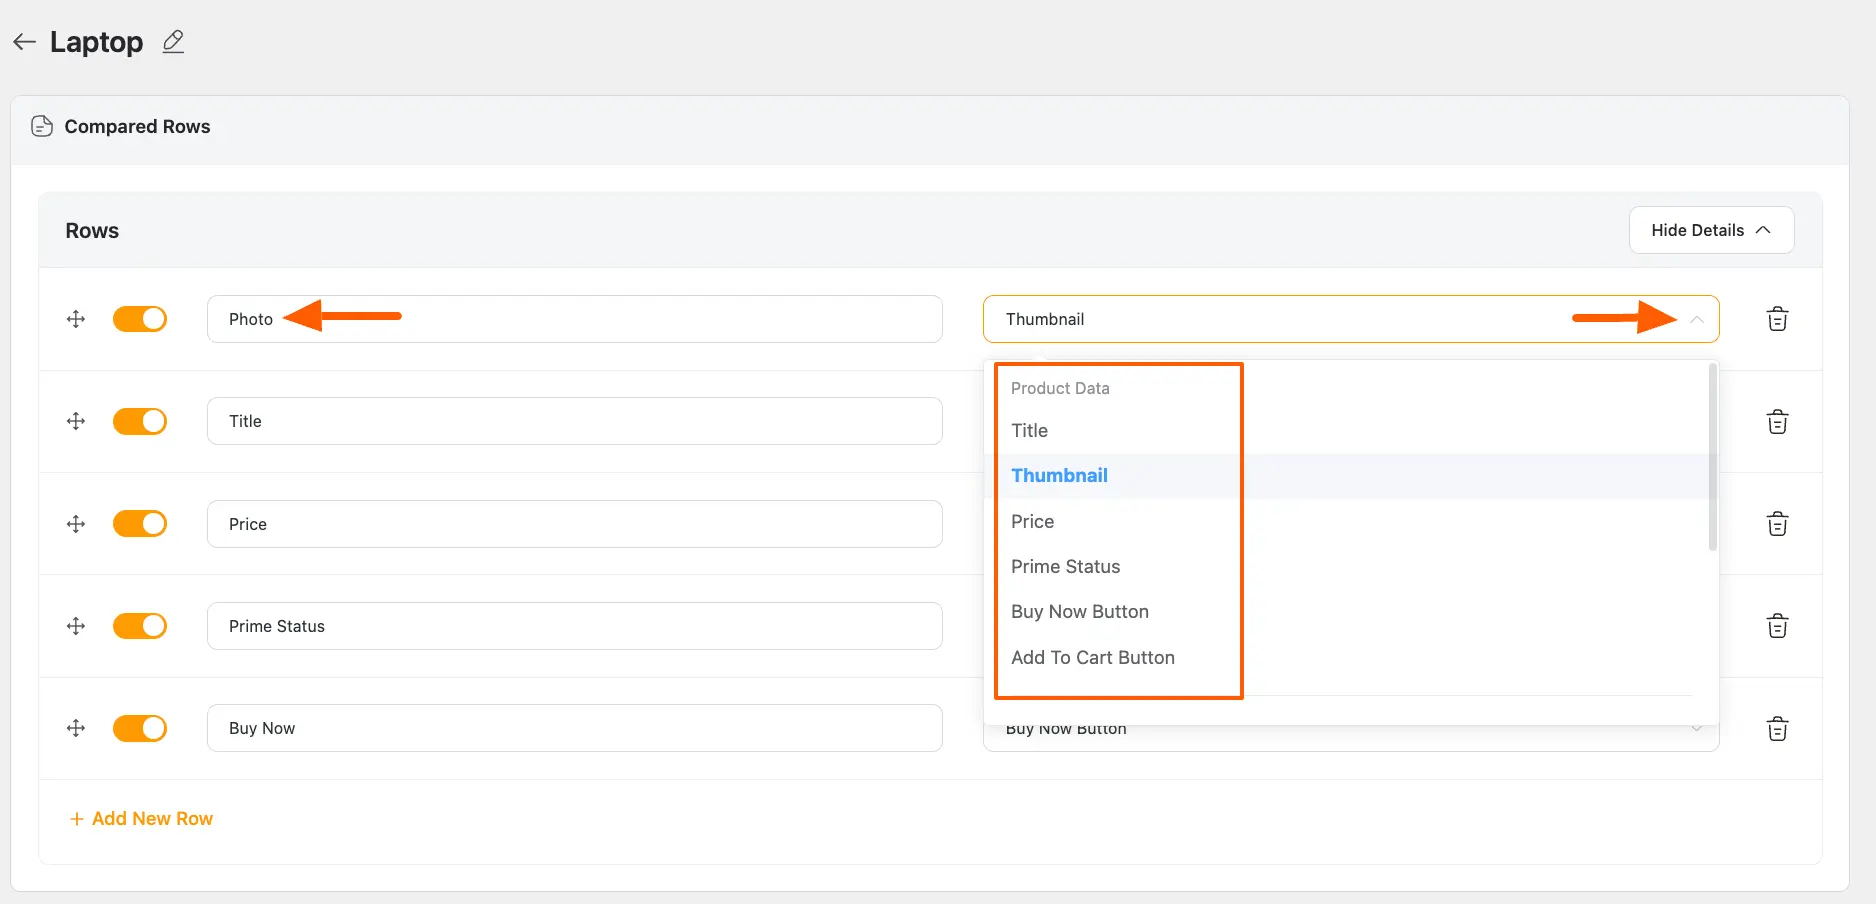
You can rearrange rows by using the drag-and-drop handle to move them up or down. You can also hide or show any row using the orange Toggle button.
To add more rows, click the + Add New Row button. If you want to remove a row, click the Trash icon.
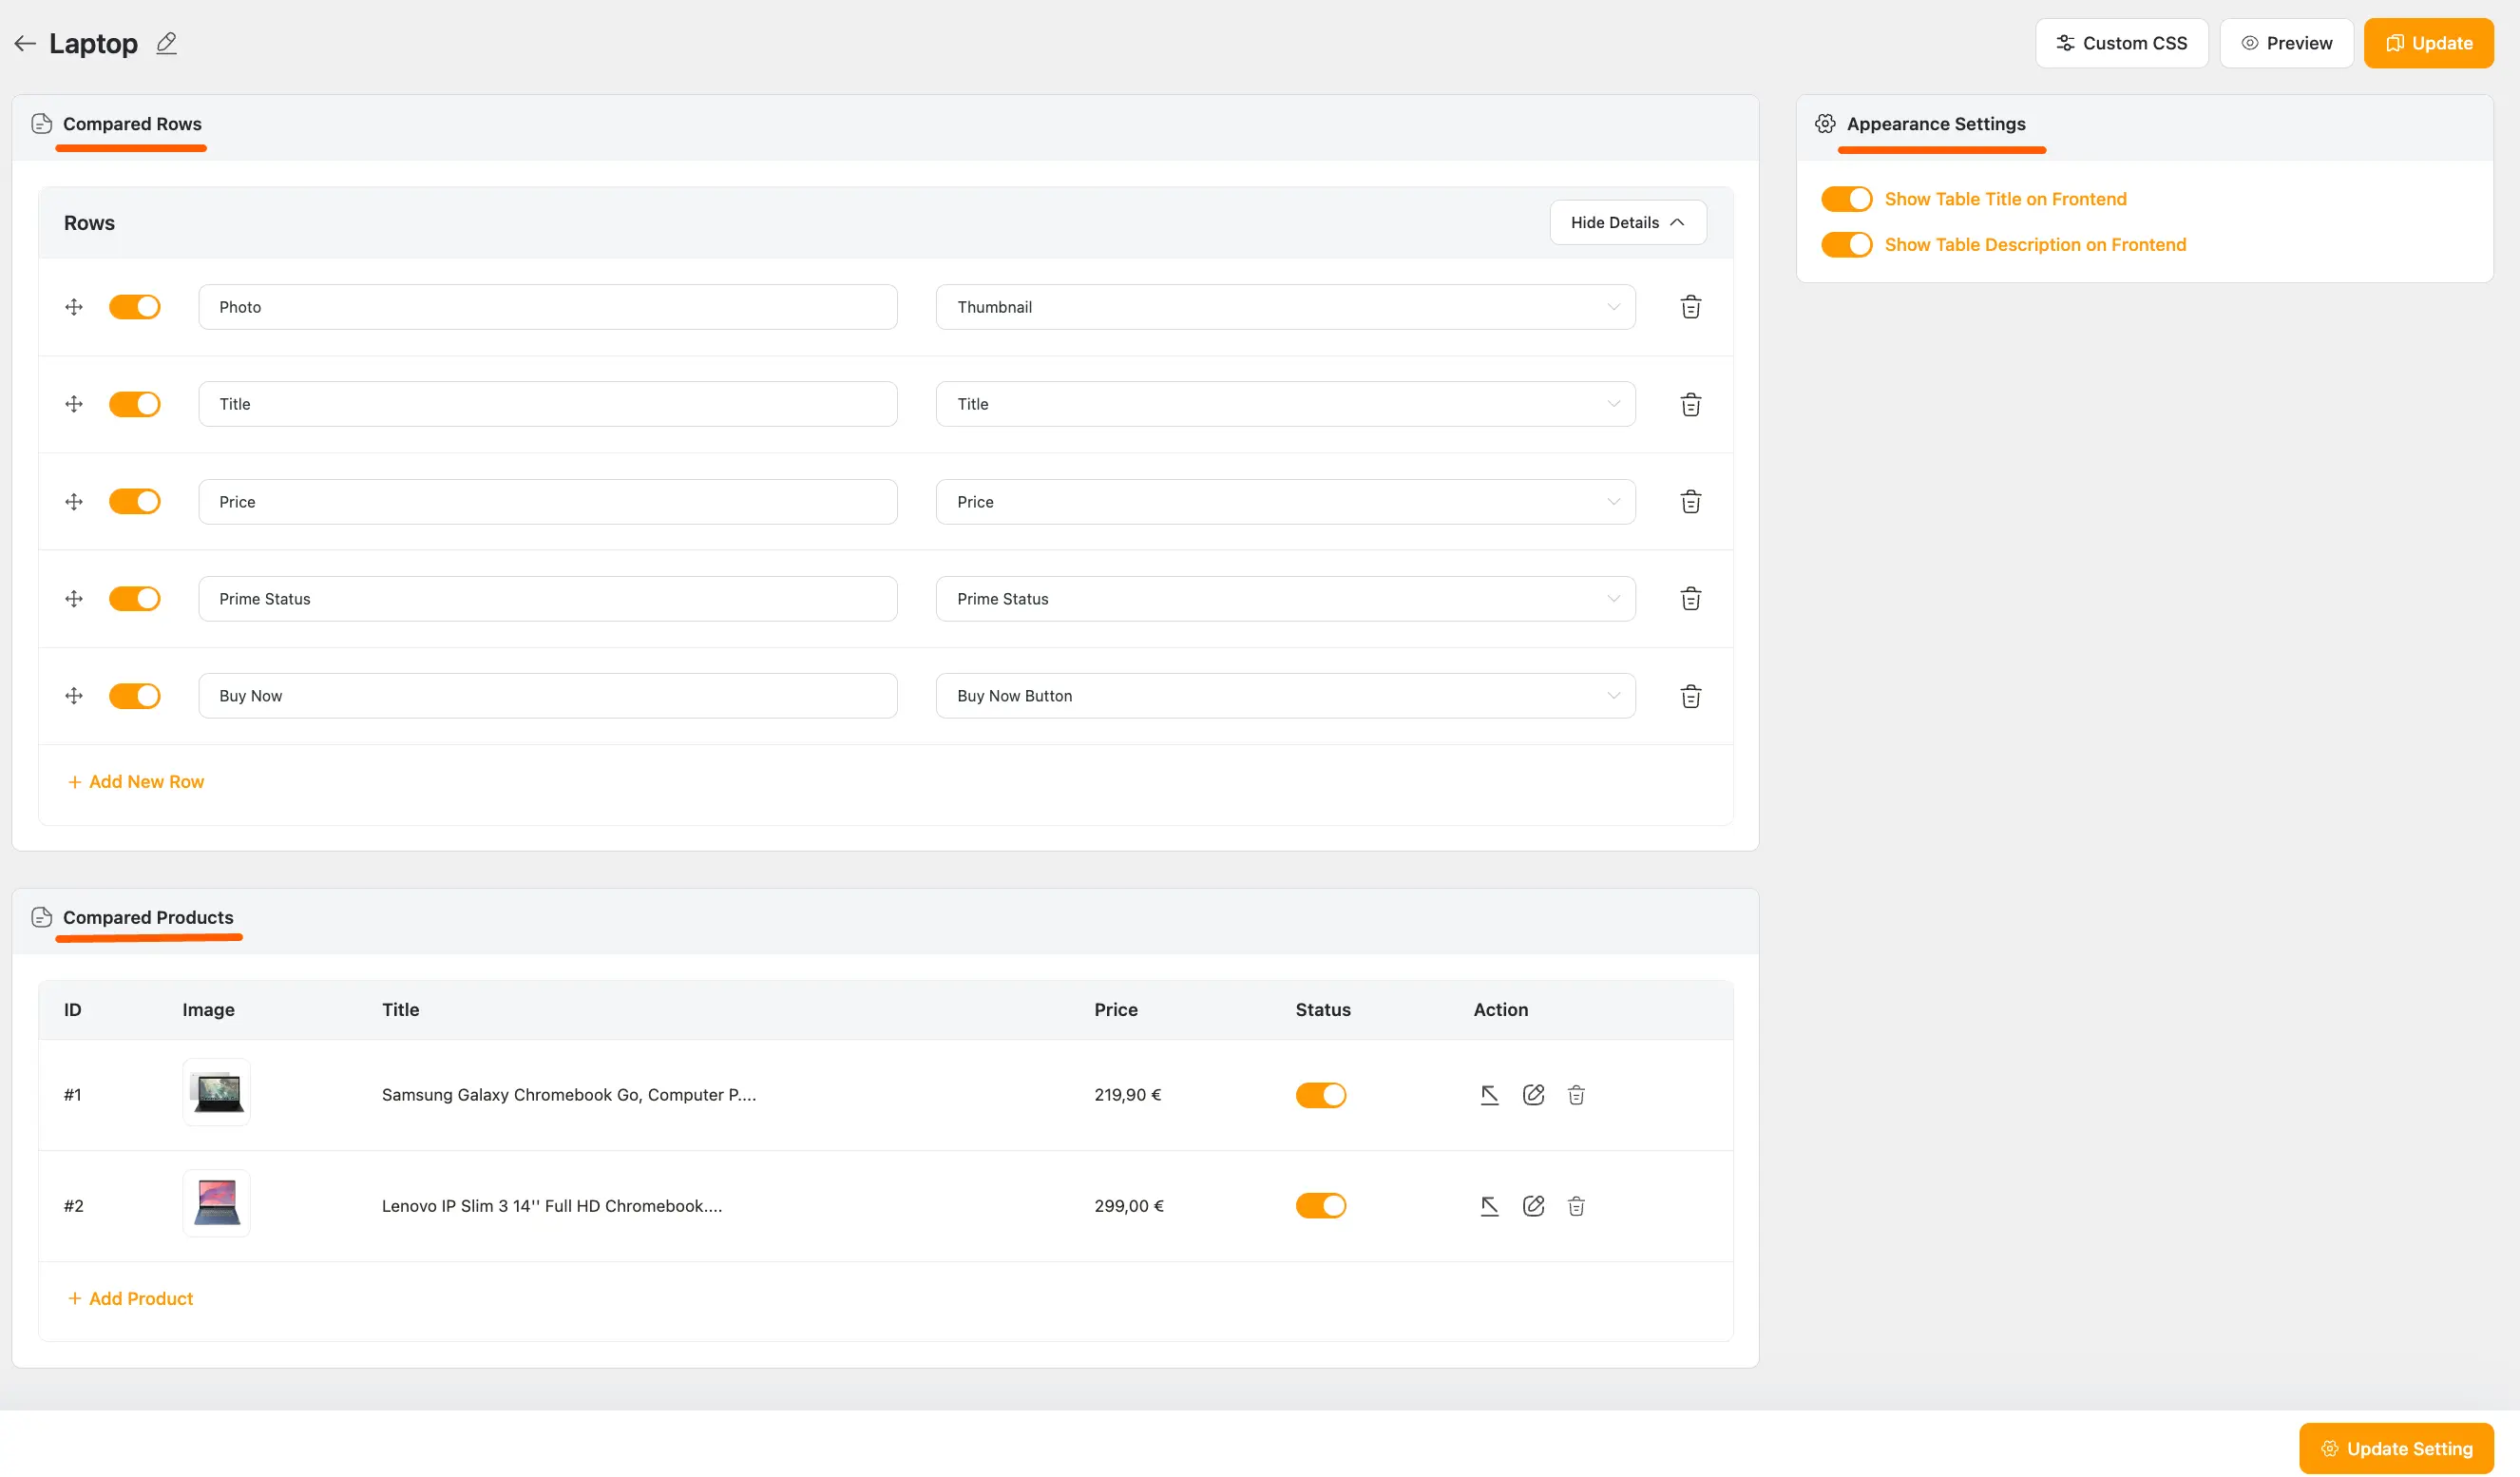
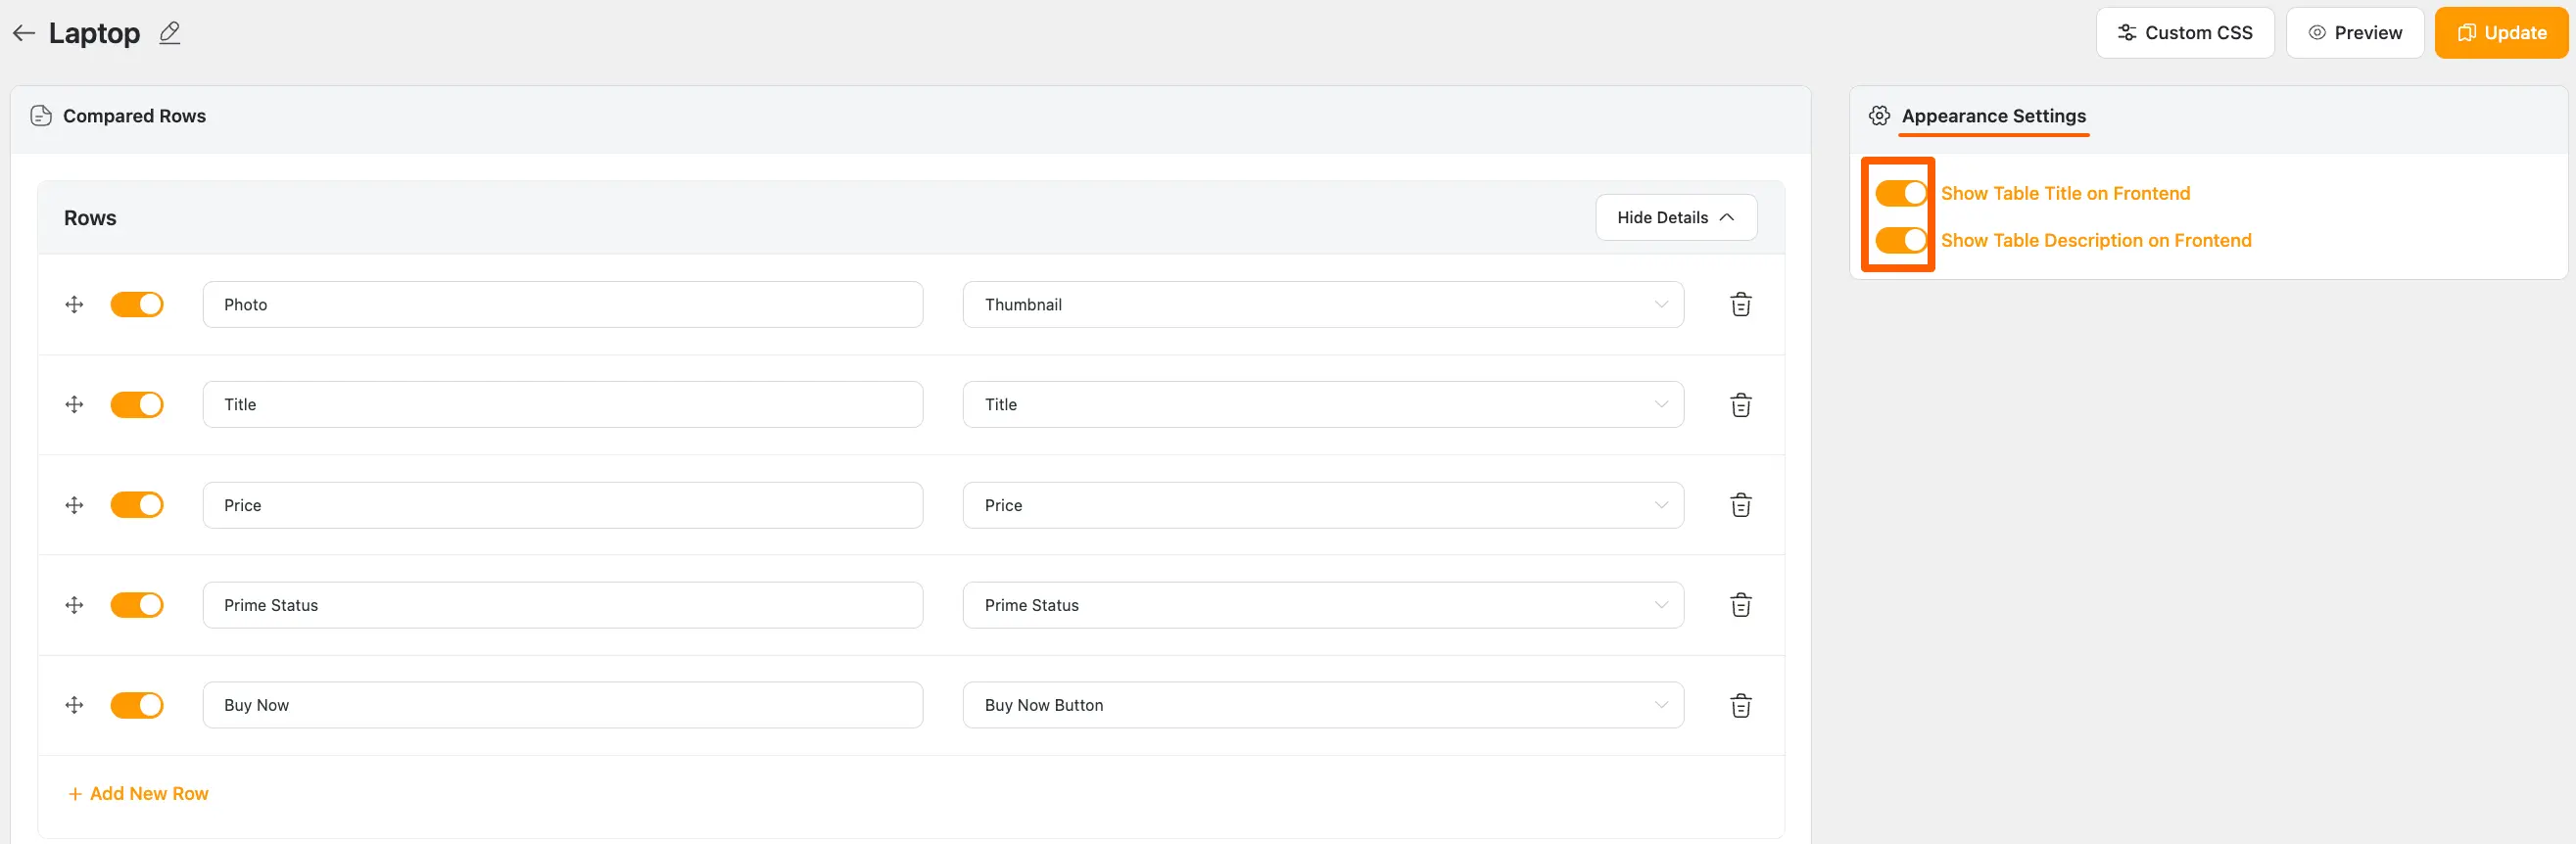
Appearance settings
From the appearance settings in the top right corner, you have two more options for showing the Table Title and Table Description in the front end.
NOTE
To learn about customizing tables through Appearance Settings in detail, read this Documentation.
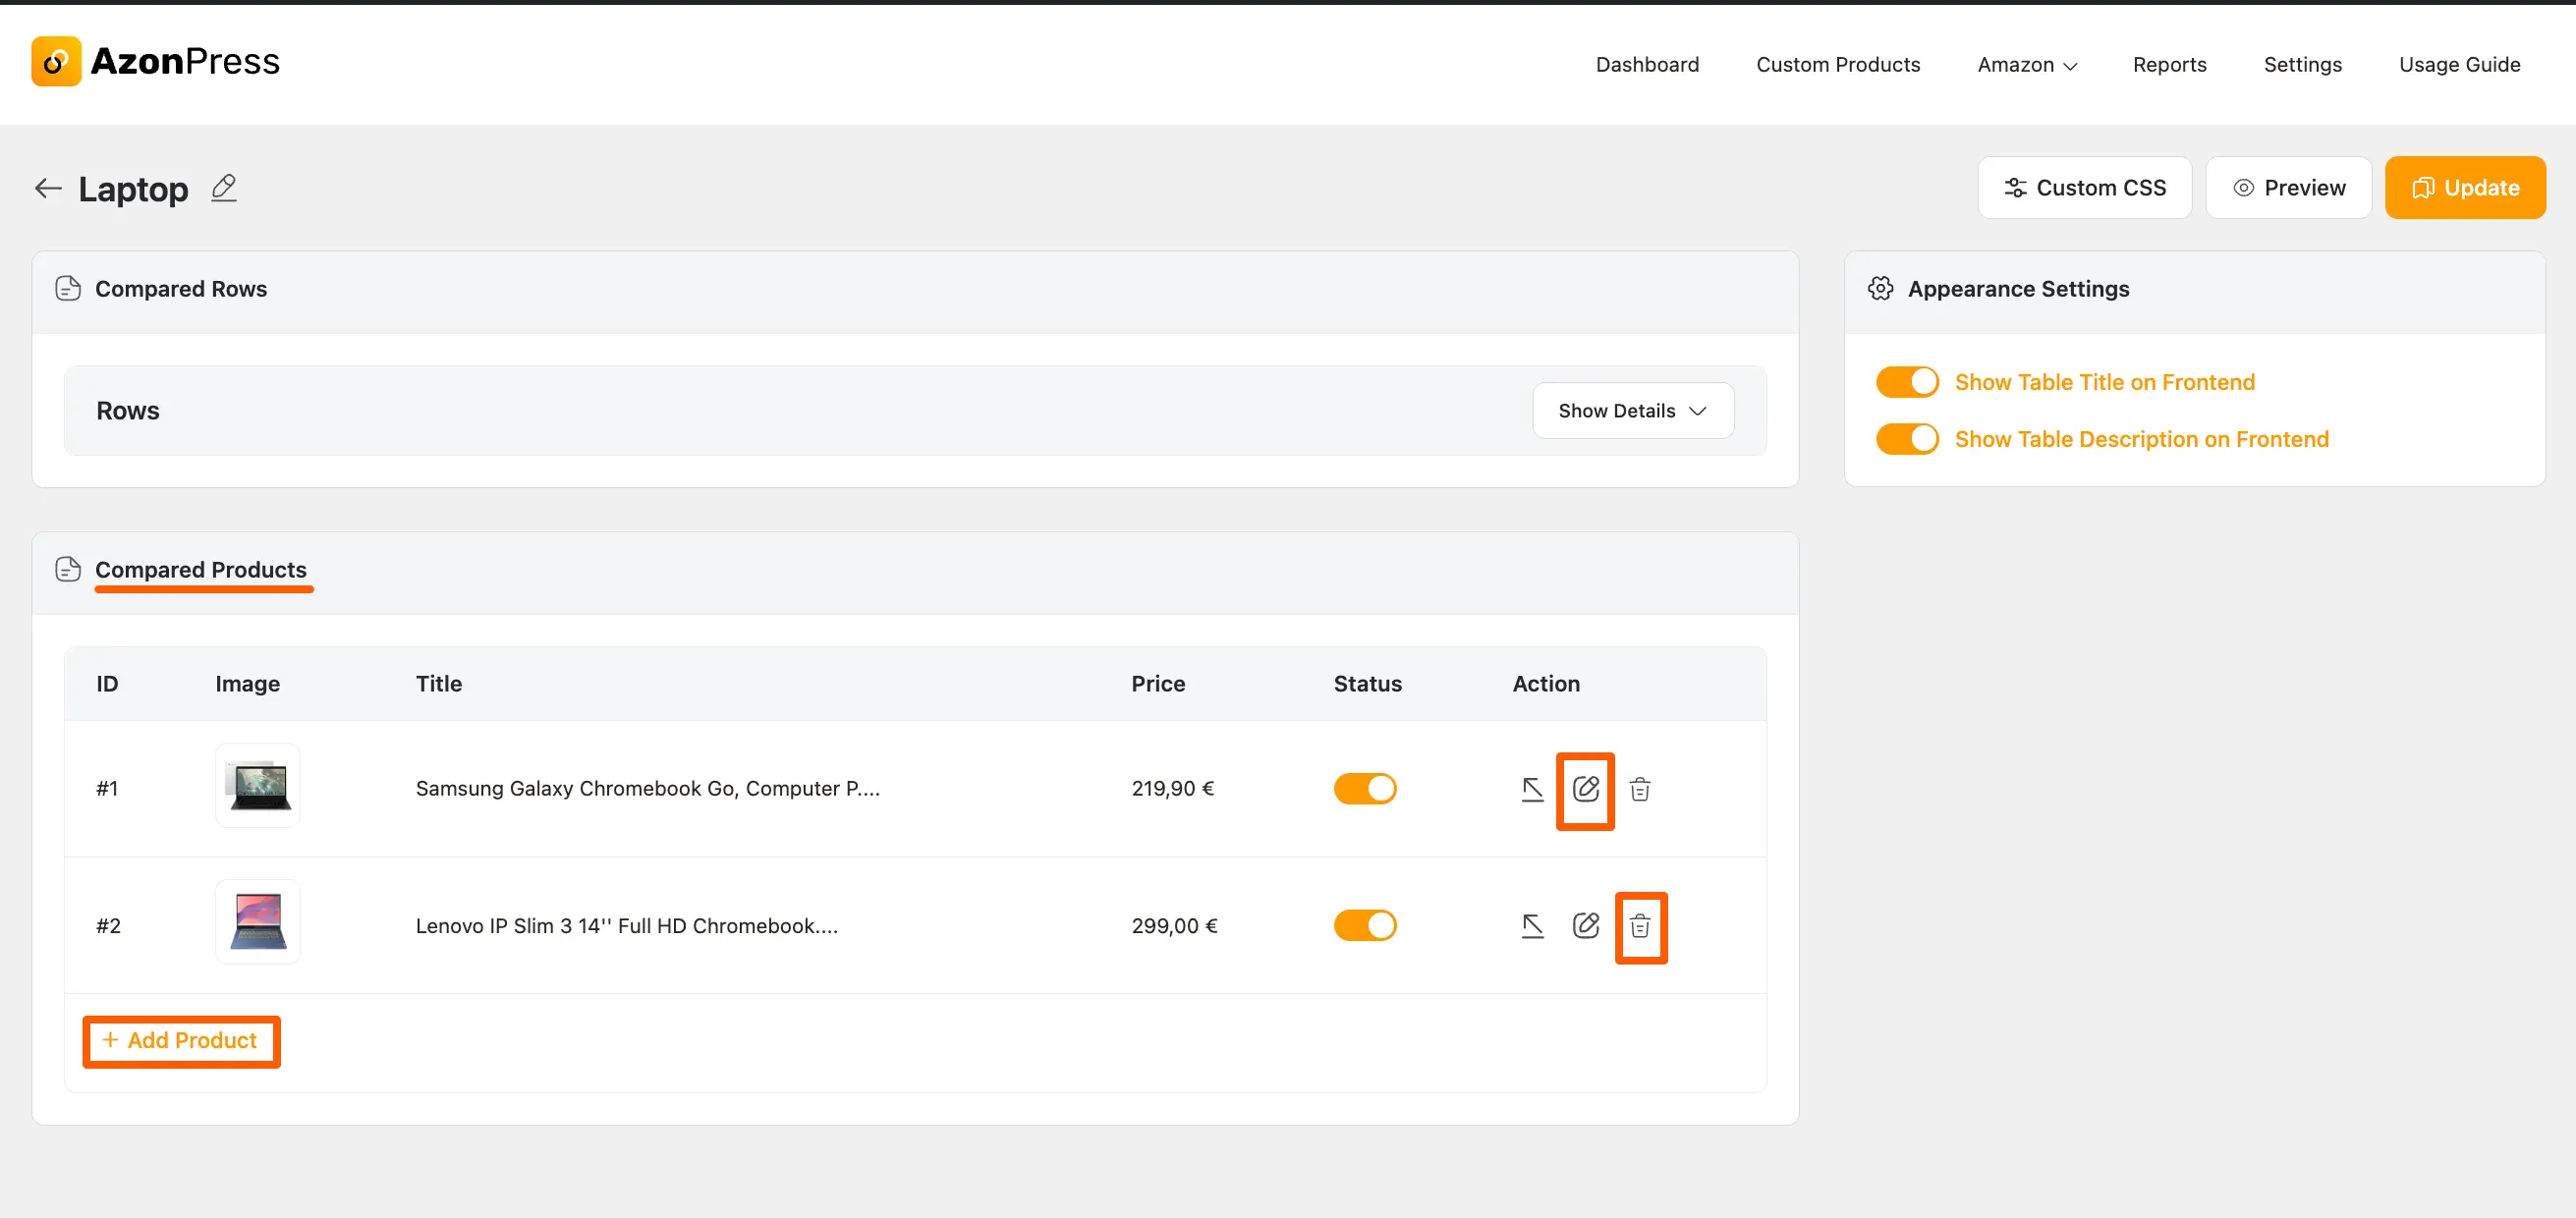
Compared Products
In the compared products section, you will see the products you added to your comparison table. Here, you can manually edit the information of your comparison table for an individual product.
To do this, go to the desired product you want to edit and click on the Pencil Icon and a popup page will appear.
Also, you can add more products by clicking the + Add Product button and delete any products by clicking the Trash icon.
Here, you will get a list of dropdown items that will allow you to change the default value of a row inside a product.
Now, you can change the default value of your product row by clicking the Arrow Icon and choosing the value that suits your needs.
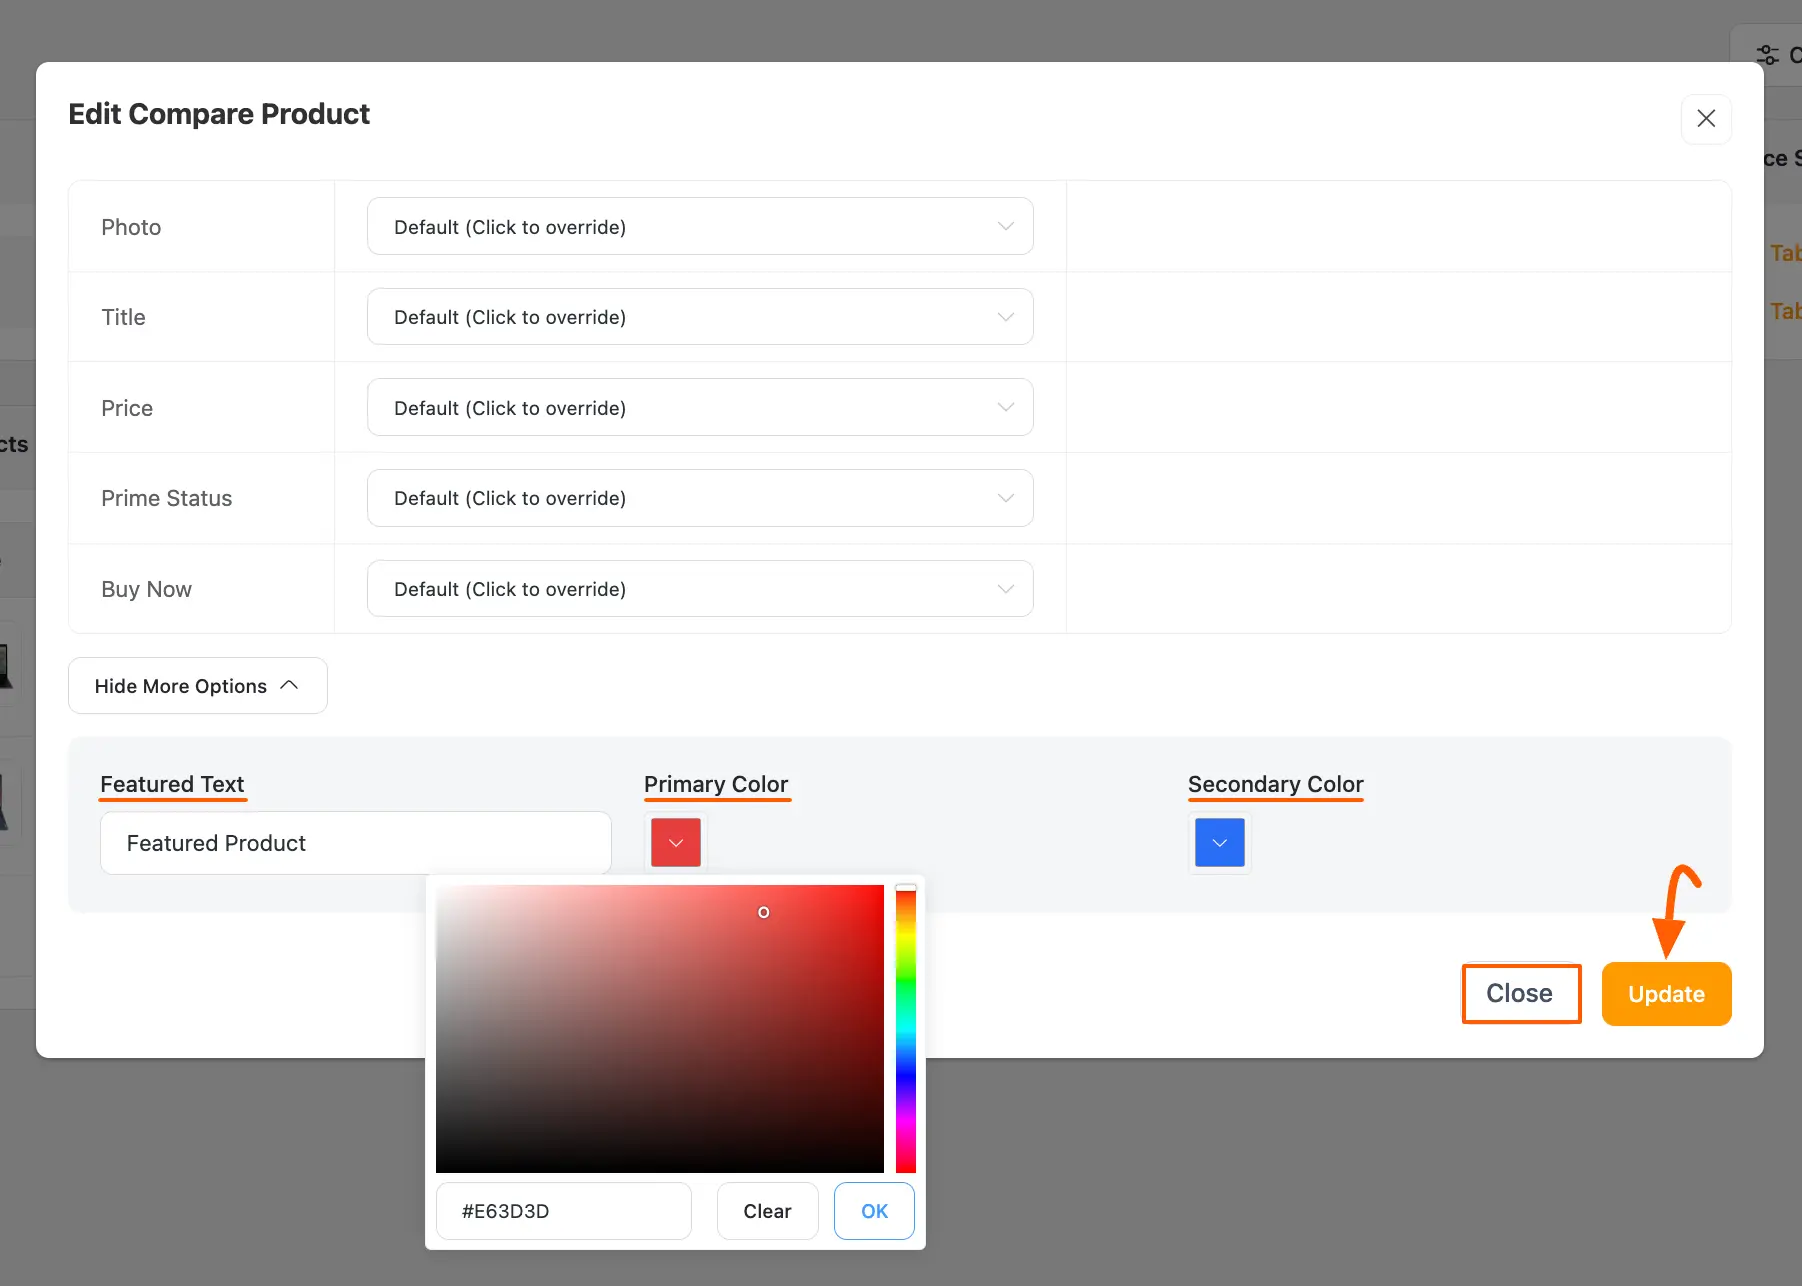
If you want to highlight a specific product in the comparison table click on Show More Options and it will open up with a Featured Text input field.
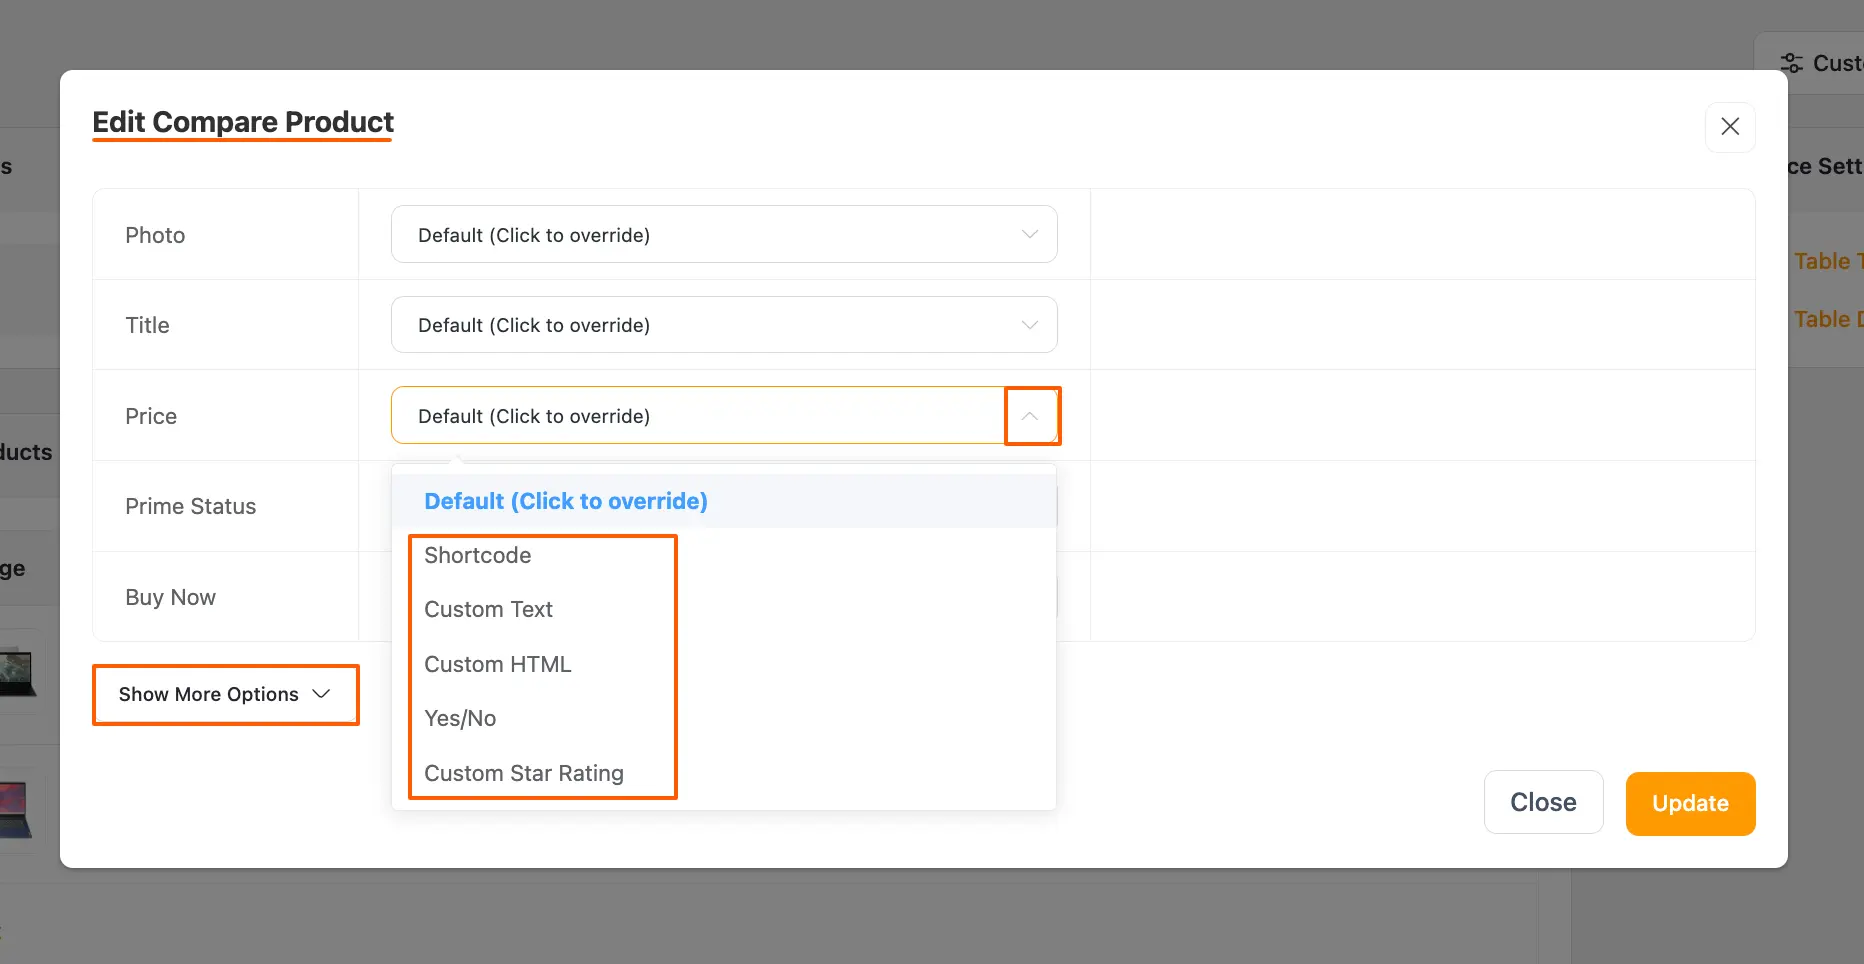
Now, write a text into the Featured Text field that you want to show, e.g., Recommended, Best Pick.
Then, give it a Primary Color, so the column stands out from others, and you can ensure better user engagement. To set a different text color to the heading, use the Secondary Color.
Once you are done, press the Update button to save all the changes. If you don't want to save simply press the Close button.
Once you complete all the customization, click the Update or Update Setting button, and your tables will be ready to display.
You can see the preview of your table by clicking the Preview button as well.
Additionally, to do any custom design in your table, press the Custom CSS button. You can also change the Table name anytime by clicking the Pencil Icon right next to the table name in the top left corner.